
Foundation sounds simple until you’re looking at a sponge, a brush and your own two hands, wondering which one gives you a smooth, skin-like finish. Each one lays product down a little differently, so the right pick depends on your formula, your skin and how much time you have in the morning. If you only want one, make it a damp makeup sponge, since it presses foundation into your skin instead of sitting on top and forgives messy blending. A dense buffing brush is great for more coverage from less product, and your fingers are the sweet spot for creams, sticks, sheer formulas and dry, flaky skin.
How much foundation reaches your face
Sponge: A damp sponge soaks up some of your foundation, so a fair amount never makes it to your skin. That’s a small hit to your wallet but good news for your face, since less product means a thinner, more even layer. Bouncing also sets it down in tiny overlapping dots instead of dragging it in one direction, which is why your skin still looks like skin. If the waste bugs you, a microfiber option like the Juno & Co. Microfiber Velvet Sponge absorbs far less than classic foam, so more of your foundation reaches your face.
Brush: Synthetic bristles hold product on the surface and let go of almost all of it, so one pump goes further and lands a bit heavier. A brush also shows every extra drop, so start with less than you think you need.
Fingers: Your fingers fall somewhere in the middle on how much they put down, but they win on warmth. Warm foundation turns softer and spreads more easily, which is why creams and sticks glide so much better under a fingertip than under a cool brush.
Coverage and finish

Sponge: Wet the sponge, squeeze it out hard and bounce it instead of swiping. Swiping pushes product into fine lines and pulls it off the high points of your face, so foundation ends up exactly where you don’t want it. How damp it is matters more than which sponge you buy, because a dry sponge drinks up product and streaks while a wet, well-squeezed one behaves completely differently. The Real Techniques Miracle Complexion Sponge is an easy one to start with, since its flat edge presses foundation along your nose and under your eyes without the rounded body getting in the way. The Beautyblender Original is springier, with finer pores, so it leaves softer edges and holds up through more washes, though it soaks up a little more product. Our comparison on the Beautyblender Original walks through how the classic stacks up against drugstore sponges, and the main differences come down to how long each one lasts and how soft the edges look.

Brush: If you like medium to full coverage, a dense buffing brush is your friend, since coverage builds in seconds and nothing gets soaked up along the way. The shape changes the result more than the price does. A rounded, tapered brush like the Real Techniques Expert Face Brush blends forgivingly for everyday buffing, a flat-top kabuki such as the Sigma F80 Flat Kabuki Brush packs product down for the most coverage and handles powder and mineral foundation too, and a flat paddle brush paints product on and usually needs a second tool to smooth out the strokes. Our brush shapes guide covers all of this, so read it before you buy a ten-brush set and end up using only two.
Fingers: With sheer skin tints, serum foundations, tinted moisturizers, cream sticks and cream blush, fingers are often the best first tool, with a sponge to finish. Press the product on in sections and blend the edges with your ring finger, then go over your T-zone with a barely damp sponge if anything looks patchy. Fingers are less precise around your nose, the inner corners of your eyes and anywhere skin folds, which is where the sponge comes in handy.
How fast each one gets you out the door
Sponge: A sponge takes a little longer if you want real coverage, since every extra layer means more bouncing. It can also feel slow with heavily pigmented formulas that set fast, because you’ll be racing the clock.
Brush: This is the speedy one, so if you get ready in under ten minutes, a single pump can cover your whole face and you’re done.
Fingers: Your fingers are always with you, but their biggest perk is control. You can feel thick spots and dry patches before you see them and adjust as you go, which makes a quick tint almost effortless.
Which works best with your formula
Your formula matters even more than your skin type, because a great tool can look like a bad one on the wrong texture.
| Formula | Best tool | Why |
|---|---|---|
| Liquid, medium coverage | Damp sponge | Sets thin and even, keeps the finish skin-like |
| Liquid, full coverage or long-wear | Buffing brush | Fast set times need speed; a sponge wastes too much pigment |
| Cream or stick foundation | Fingers, then a sponge | Warmth loosens the wax base so it moves instead of grabbing |
| Skin tint or tinted moisturizer | Fingers | Barely any product to move; a sponge absorbs most of it |
| Powder or mineral foundation | Flat-top kabuki | Only a dense brush picks up and packs down loose pigment |
| Serum or “glow” foundation | Damp sponge | Thin and slippery, so bouncing prevents streaking |
Oily, dry, textured or mature skin
Sponge: Textured skin, like big pores, acne scars or bumpy clogged skin, is where a sponge helps most, because bouncing sets product on top of a bump instead of pushing it into the dip beside it. On very oily skin, keep it just barely damp, since a wet sponge on an already slick face can make foundation slide instead of grip.
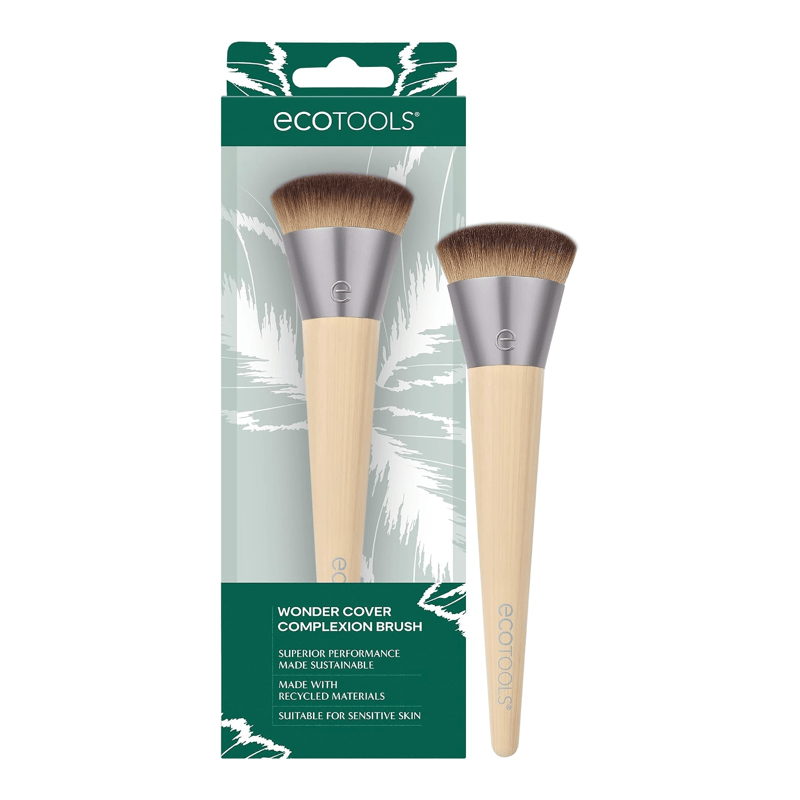
Brush: Oily skin does best with a brush and a light hand. Texture is the one area where a brush needs a little help, because the bristles travel across your skin and can catch on big pores, a healing spot, dry patches or light peeling from a retinoid. Working in tight circles instead of long sweeps helps a lot, and a few seconds of bouncing with a damp sponge afterward helps even more. For combination skin, the EcoTools Wonder Cover Complexion Brush is soft enough not to streak over dry patches but dense enough to build coverage. If your skin is mature or crepey, skip the flat paddle brush and press on one thin layer in a single pass, since every extra layer just gives you more to crack.
Fingers: Dry or flaky skin loves fingers first and a sponge second, so warm the product, press it on and skip the buffing so you don’t lift the flakes. On oily skin, reach for your fingers a little less often, since they add a touch of oil and makeup can wear off sooner if you’re already shiny by lunch.
Keeping each one clean
Sponge: A sponge needs washing after nearly every use. Sitting damp on the counter, it’s warm, wet and full of skin and makeup, which makes it the perfect home for bacteria, so wash it and let it dry all the way.
Brush: If you wear foundation every day, wash your brush once a week. Brushes dry faster than sponges, and that makes them the easiest of the three to keep fully clean. A quick-drying spray like Cinema Secrets Brush Cleaner lets you clean between uses, but since it’s solvent-based, keep it for brushes and not sponges.
Fingers: Wash your hands first every time, since unwashed hands on your face spread bacteria. If you break out easily, lean on a tool more often.
Which tool is yours?
If you have textured skin or visible pores, reach for a damp sponge and stick to bouncing, because a brush can push product into the low spots and outline the high ones.
If you’re out the door in five minutes, grab a dense buffing brush and work one pump in small circles, saving your hairline and jaw for last.
If you wear full coverage, lay the base down with a brush, then bounce a barely damp sponge over the center of your face for ten seconds. That way the brush gives you the coverage and the sponge makes it look real.
If your skin is dry or peeling, use your fingers. Warm the foundation between your fingertips, press it on in sections, and once a spot is set, leave it alone until the flaking clears up.
If you break out often, go with a brush and wash it weekly, since fingers spread oil and bacteria and sponges tend to stay damp.
If you only ever wear a skin tint, your hands are all you need, because a sponge would soak up a lot of a product that was sheer to begin with.
Honestly, one good sponge, one dense buffing brush and your own hands for creams will cover almost every formula and every kind of morning. There’s more in our makeup tools guide and the makeup archive.


