
Brides whose makeup stays fresh through tears, hugs, heat and a packed dance floor usually weren’t lucky that morning. They made their decisions early, and nothing on their face that day was new to them. Treat your wedding makeup as a countdown that starts about three months out, where you choose an artist (or decide to do it yourself), have a trial six to eight weeks before, lock in every product two weeks out, pack a touch-up kit the week of, and then follow the exact order you practiced. Below, each stage gets its own section, plus what to do if you’re behind.
Your countdown at a glance
Screenshot this, or send it to whoever’s holding your phone that morning.
| When | Do | Don’t | Read next |
| 3 months | Decide artist, lesson or DIY. Ask about dates, and save photos of makeup on faces like yours | Sign for the full bridal party before a trial | Hiring an artist |
| 6-8 weeks | Hold the trial, wear it eight hours, photograph it in daylight and with flash | Approve it in the chair and wash it off at home | The trial · Photos |
| 2 weeks | Lock the product list, buy backups and travel sizes, re-test anything you changed | Swap your foundation, mascara or lip color | Clé de Peau · La Prairie |
| The week of | Pack the touch-up kit, pick its carrier, confirm the morning schedule | Try a product a friend swears by | Eyes · Lips |
| The morning of | Prep, primer, thin base, set, eyes, lips, spray. Hand off the kit | Rush the layers or add anything untested | Making it last · Setting sprays |
Three months out: artist, lesson or DIY
Hiring an artist is worth the fee when you’ve got a long day ahead, a photographer on the clock and a hand you don’t quite trust with liner. If your wedding is small or casual, or you already do your own makeup really well, doing it yourself makes more sense.
There’s also a smart middle option that people tend to miss, where you book one paid lesson with an artist and then do it yourself on the day. Our take on hiring a bridal makeup artist covers what a booking usually includes and how the cost adds up, along with why you shouldn’t book the whole bridal party until you’ve seen the artist’s work on your own skin tone. If airbrush gets offered as an add-on, read our airbrush makeup verdict before you say yes.
Good artists book up early in busy seasons, so reach out as soon as you have a date and treat three months out as about the latest you should decide. While you’re at it, save photos of makeup on faces like yours, because those help far more at a trial than a celebrity shot. This is also when your skin prep really begins, since makeup lasts best on calm, hydrated skin and getting there takes months rather than one morning. Our bridal skincare timeline walks you through that long game.
Six to eight weeks out: the trial
Six to eight weeks out is the sweet spot, because any earlier and your skin or hair color might change before the wedding, while any later leaves you no time for a second try. Many brides line the trial up with a dress fitting or engagement photos, so they can see the makeup with their neckline or through a real camera.
Then put it through its paces by wearing it for eight hours, snapping photos in daylight and with flash, and hugging someone in a white shirt. It’s tempting to approve the look in the chair and wash it off at home, but the chair is the one place every look seems perfect. Our guide to the bridal makeup trial covers what to bring, how to give feedback and which red flags to watch for. If you’re doing your own makeup, you still need a trial, so run through it with every product you plan to use and write down the order.
The trial is also your chance to see what the camera sees. Cameras flatten your face, so bridal makeup usually needs a touch more blush, fuller brows and a clearer lash line than you’d wear to dinner, while still looking like you, just turned up a notch. Flash is the sneaky part, since some powders and sunscreens can look ghostly white under it and you won’t know until the photos come back, but a phone flash in a dim room catches that early. Makeup for wedding photos goes deeper on shine, lighting and matching your face to your neck and chest against a white dress.

If you cry at weddings that aren’t even yours, cry-test your mascara at the trial on purpose, because the ceremony is a bad time to find out which formula runs. On the day itself, fold a Kleenex On-the-Go tissue and press it under your lash line instead of wiping.
Two weeks out: lock the list
Once you’re happy with the trial look, think of your product list as closed. Pick up backups and travel sizes and re-test anything you changed, but hold off on swapping your foundation, mascara or lip color now, even if something shiny just launched.
Eyeing a splurge foundation? Make that call now, not the night before. Two of the priciest each have their own write-up here: Clé de Peau Beauté The Foundation is a cream in a jar, while La Prairie Skin Caviar Concealer Foundation is a liquid with a matching concealer tucked in the cap. They’re gorgeous, but how long any foundation lasts really depends on what’s under and over it, and our long-wear foundation roundup has reliable options at every price.
If you’re under two weeks out and haven’t had a trial at all, wear your planned look for a full day this weekend using products you already own, since a tested everyday foundation beats an untested expensive one every time.
Wedding week: pack the touch-up kit
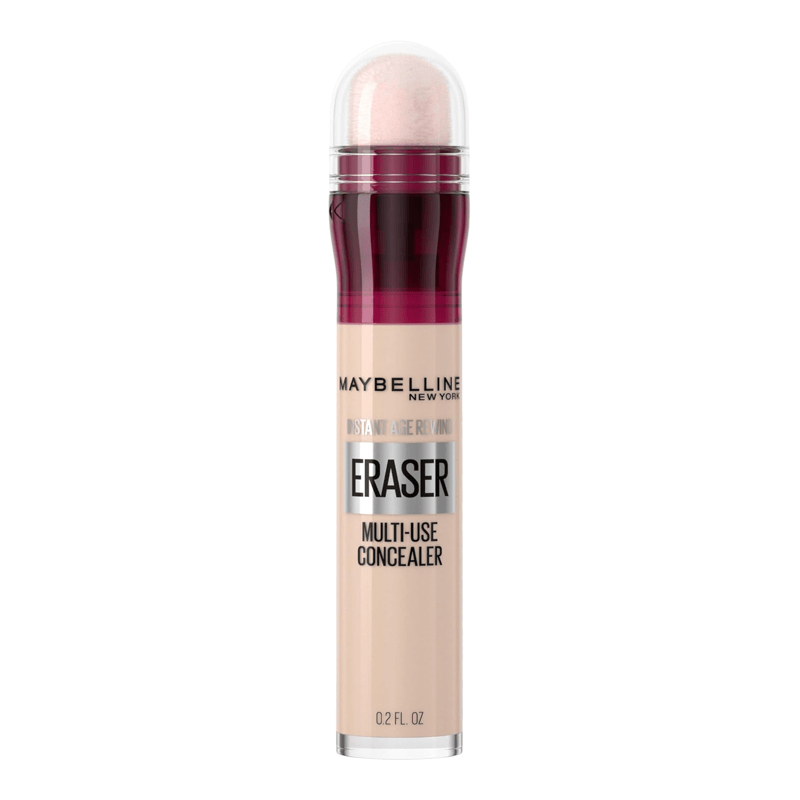
Since you probably won’t have a pocket, hand a small kit to a bridesmaid, your mom or the artist’s assistant. It only needs to take down shine, fix a smudge and redo your lips. For smudges, the pointed end of Q-tips Precision Tips lifts mascara from under your eye without dragging your concealer along with it. The Maybelline Instant Age Rewind Eraser Concealer has a built-in sponge tip for tapping over a tear track without a brush, as long as you shade-match it at your trial. Then add an NYX Slim Lip Pencil right next to the lip color from your trial, since liner is what’s left once your lipstick wears off. If your artist is staying, ask what they carry and how long they’re booked, because if they leave after the ceremony, you’ll want your own kit for the reception, which is exactly when shine and faded lips tend to show up.
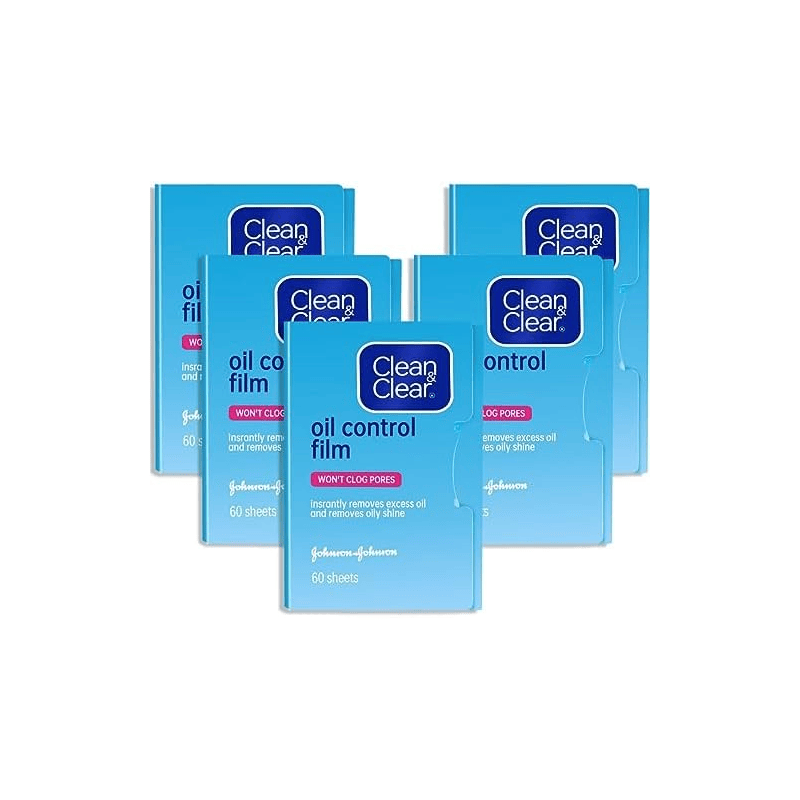
Always blot before you powder, because powder pressed onto oil turns cakey. Clean and Clear Oil Absorbing Sheets lift shine without adding any product, so just press, hold and lift. After that, a pressed compact like Laura Mercier Translucent Pressed Setting Powder is the safer pick, since it can’t spill down your dress the way a loose jar can. How to blot makeup walks you through it, and our midday touch-ups guide gives you the order to fix things in when you’ve only got three minutes. This is also the week to confirm the morning schedule and keep your skincare simple, and the wedding week skincare guide covers those last few days.
The morning of, step by step
Plan your morning backward from when the photographer starts, not from the ceremony. Ask your artist how long each face takes, or use your own practice-run time, and add a cushion. If you’re sharing one artist with the bridal party, ask for a spot near the end with one person after you as a buffer, so your makeup stays freshest.
Step 1: Eat and dress for it. Have breakfast before anything else, and wear a button-front shirt so nothing has to go over your head.
Step 2: Skincare, then primer. Let your skincare fully sink in before anything else goes on. Then use one primer that suits your skin, and only where you need it, which means mattifying where you get oily, hydrating where you’re dry, or none at all if your base sits fine on its own. Do you need a makeup primer? settles it.
Step 3: A thin, layered base. Thin layers beat one thick coat, because a heavy first layer is the one that ends up creasing around your mouth by the reception. Aim for a little more defined than your everyday face rather than heavier, and add your cream blush and bronzer at this stage too. Wedding makeup that lasts explains how to layer and what changes in the heat.
Step 4: Powder where you shine. Press powder under your eyes, around your nose and in the middle of your forehead, but leave the tops of your cheeks alone so your glow stays put. If your skin gets oily or the ceremony is outside in the heat, lean on thin layers and blotting sheets instead of extra powder, since piling on product is what makes a face slide.
Step 5: Eyes, planned around tears. Tuck a tissue under your lower lashes to catch any fallout. Some artists do eyes before base for exactly that reason, and either order works as long as it’s the one you practiced. Tubing mascaras won’t smudge and slide off with warm water, while waterproof ones hold up to tears but need an oil-based remover that night. Tear-proof eye makeup for the ceremony covers liner, lashes and contacts, and the eyeshadow primer guide helps your shadow last twelve hours.
Step 6: Lips, once you’re dressed. Between eating, kissing and toasting, your lip color is going to wear off, so choose a shade that fades nicely and build it up in layers. A bridal lip that lasts covers using liner as a base, stain under balm, and why kiss-proof liquid lipsticks can feel so dry.
Step 7: A final mist of setting spray. At a wedding, setting spray really isn’t optional. Tuck a travel-size Urban Decay All Nighter Setting Spray into the kit, too, so a light mist after a touch-up softens any powdery look with the same spray you set with that morning. Our setting spray ranking runs from a basic long-wear mist up to a heavy-duty sealer that’s more than almost any bride needs, and setting spray vs setting powder explains why you probably want both.
After that, hand the kit to someone who’ll tap your shoulder when your nose needs blotting, and forget about your face, because that’s the whole point of all this planning.
When the plan needs a tweak
If you’re doing your own makeup, book one paid lesson and then do a full practice run at home, since an artist can fix your technique in an hour, but only a full day of wear shows you what doesn’t hold up.
If the trial left you looking like someone else, speak up that day and ask for a second try, because an artist who can’t adjust at a trial won’t adjust on the morning either.
If you’ll be outside, keep sunscreen in your routine. Some formulas, especially mineral ones, can look white under flash, so test yours with a phone flash at the trial rather than skipping it on the day. Our makeup archive has everyday looks for after the honeymoon.


